There’s something undeniably magical about the aroma of warm apples mingling with cinnamon and sweet brown sugar filling your kitchen. It's an invitation to comfort, a promise of a simple yet profoundly satisfying treat. If you're searching for a quick, cozy, and naturally gluten-free dessert that delivers on all fronts, look no further than this classic baked apples recipe. It’s a timeless favorite that captures the essence of home with minimal effort, making it perfect for chilly evenings or a delightful ending to any meal.
Far from being a complicated affair, crafting baked apples is a testament to the power of simple, quality ingredients. This guide will walk you through creating tender, juicy baked apples, highlighting how each element contributes to a symphony of flavors and textures. Get ready to embrace the warmth and charm of this beloved dessert!
Why Baked Apples are Your Go-To Comfort Dessert
In a world often craving elaborate culinary creations, the humble baked apple stands out for its elegant simplicity and profound ability to comfort. This dessert isn't just easy; it’s an experience. Imagine sinking your spoon into a perfectly tender apple, its natural sweetness enhanced by a buttery, spiced filling, with hints of caramelization peeking through. It’s a no-fuss solution for those times you need a guaranteed delicious treat without a marathon session in the kitchen.
- Effortless Elegance: With just a handful of ingredients and straightforward steps, you can create a dessert that looks and tastes far more complex than it is.
- Naturally Gluten-Free: Apples are naturally gluten-free, making this an ideal choice for those with dietary sensitivities or anyone looking for a lighter, wholesome option.
- Wholesome & Satisfying: Leveraging the natural goodness of fruit, baked apples offer a dessert experience that feels indulgent yet nutritious. It's a great alternative to heavier, processed sweets.
- Versatile Charm: Whether served warm on its own, with a scoop of vanilla ice cream, or a drizzle of salted caramel, baked apples adapt beautifully to various palates and occasions. They're a crowd-pleaser for both kids and adults, bridging generations with their nostalgic appeal.
- Seasonal Delight: While available year-round, baked apples truly shine during the autumn months when apples are at their peak freshness, making them a perfect embodiment of fall flavors.
Crafting the Perfect Baked Apples: Ingredients & Their Role
The beauty of this baked apples recipe lies in its simplicity. You only need a few core ingredients to achieve magnificent results. However, understanding the role each plays is key to unlocking the full potential of this cozy dessert.
Choosing Your Apples: The Foundation of Flavor
The apple itself is the star, so selecting the right variety is crucial. You want a crisp, firm apple that will hold its shape during baking without turning into mush, yet still become tender and juicy. Avoid overly soft or mealy varieties.
- Golden Delicious: A classic choice, offering a balanced sweet-tart flavor and a tender, juicy texture when baked.
- Pink Lady: Known for its vibrant pink hue and a wonderfully crisp, sweet-tart profile that holds up well to heat.
- Honeycrisp: As its name suggests, it’s incredibly crisp and sweet, with a juicy interior that becomes lusciously tender in the oven.
- Granny Smith: If you prefer a tarter dessert to balance the sweetness of the filling, Granny Smith is an excellent option. Its firm flesh bakes beautifully.
Pro Tip: Don't be afraid to mix and match! Using a combination of sweet and tart apples can add depth and complexity to your finished dish.
The Sweet & Spicy Heart: Filling Essentials
The core of your apple transforms into a delicious cavity for a rich, aromatic filling. This blend of simple ingredients creates that signature warm, caramelized flavor.
- Dark Brown Sugar: More than just sweetness, dark brown sugar brings a deeper, molasses-rich flavor profile and a wonderfully moist texture to the filling. It caramelizes beautifully, creating a sticky, golden syrup at the bottom of the dish.
- Unsalted Butter: Cubes of butter are essential for richness and flavor. As it melts, it seeps into the apple flesh, carrying the sugar and cinnamon, and helping to create that tender, juicy consistency.
- Ground Cinnamon: The quintessential spice for apples, cinnamon infuses the dessert with its warm, fragrant notes, perfectly complementing the fruit's natural sweetness.
- A Pinch of Salt: Often overlooked, a tiny pinch of salt (a quarter teaspoon for several apples is usually enough) doesn't make the dessert salty. Instead, it acts as a flavor enhancer, intensifying the sweetness of the sugar and the warmth of the cinnamon, bringing all the flavors into sharper focus.
Elevating Your Filling (Optional Additions): Want to take your baked apples to the next level? Consider these enhancements:
- Oats: A tablespoon of rolled oats mixed into the sugar-cinnamon blend adds a delightful chewy texture and a subtle nutty flavor.
- Nutmeg or Ginger: A pinch of ground nutmeg or ginger can add another layer of warm spice.
- Dried Fruits: A few raisins or dried cranberries can introduce chewy sweetness and a burst of fruity flavor.
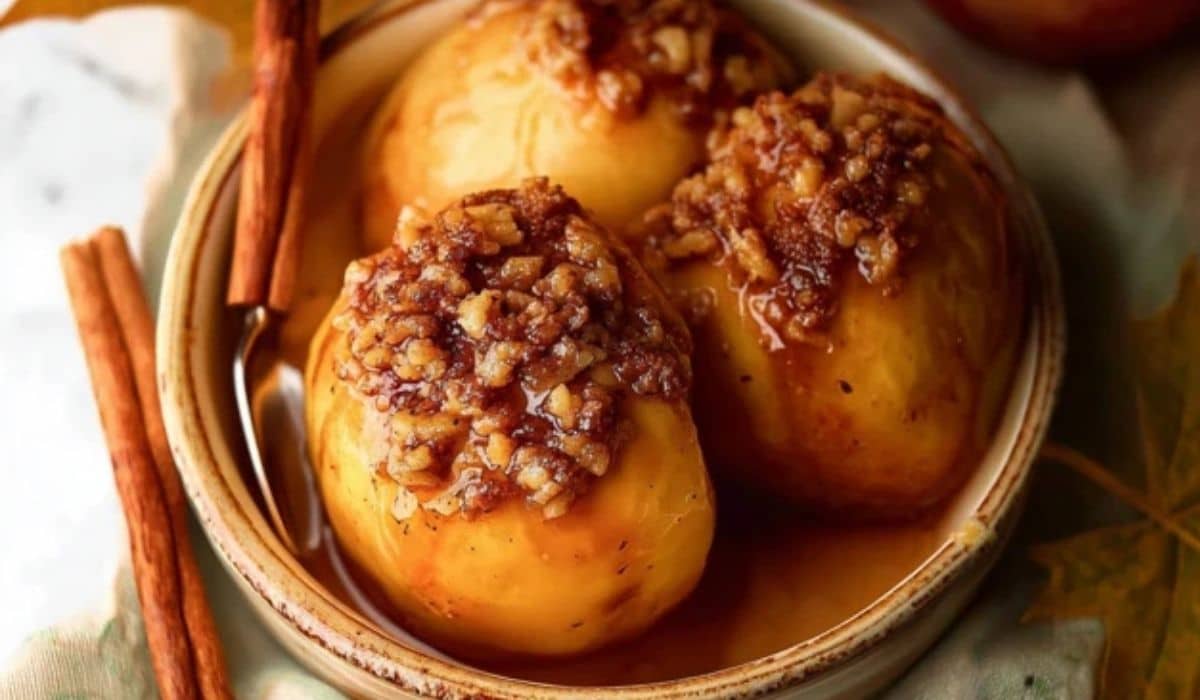
- Nuts: Chopped pecans or walnuts provide a satisfying crunch and nutty richness.
- Citrus Zest: The zest of an orange or lemon can brighten the entire dish with a fresh, aromatic note.
Baking Bliss: Step-by-Step Guide for Tender Perfection
Preparing homemade baked apples is remarkably straightforward. Follow these steps for a comforting dessert that’s guaranteed to impress.
Prep Work: Coring Made Easy
This step is crucial for creating the well that holds your delicious filling. While it might seem daunting, it's quite simple.
- Wash and Dry: Thoroughly wash your apples and pat them dry.
- Core with Care: The easiest method is to use a dedicated apple corer. Simply push it through the center of the apple, from top to bottom, removing the core and seeds while leaving the bottom intact to hold the filling. If you don't have a corer, a sharp paring knife can work. Carefully cut around the core, then use a spoon to scoop out the seeds and any remaining core bits, again being careful not to cut all the way through the bottom. You want to create a generous cavity.
Expert Insight: Leaving the bottom intact is key. If you accidentally cut through, don't worry! You can plug the hole with a small piece of apple or a bit of bread to prevent the filling from escaping.
Baking to Golden Perfection
Once your apples are prepped and filled, it’s time for the oven to work its magic.
- Preheat Oven: Preheat your oven to 350°F (175°C).
- Prepare Filling: In a small bowl, combine the brown sugar, cinnamon, and salt (and any optional additions like oats or nuts).
- Stuff the Apples: Place the cored apples in a baking dish that's just large enough to hold them snugly. Generously stuff each apple's cavity with the brown sugar mixture.
- Add Butter: Top each stuffed apple with a pat or two of butter. This will melt down into the filling, adding richness and moisture.
- Moisture for Tenderness: For extra juicy, tender apples and to prevent the bottom of the dish from scorching, pour about ½ inch of warm water into the bottom of the baking dish. This creates a steamy environment that helps the apples cook evenly and stay moist.
- Bake Covered: Cover the baking dish tightly with aluminum foil. Bake for 20 minutes. This initial covered period traps steam, helping the apples soften without drying out.
- Bake Uncovered: Remove the foil and continue baking for another 20-25 minutes, or until the apples are fork-tender and the sugar mixture has caramelized into a bubbly, irresistible syrup. The exact baking time can vary slightly depending on the size and variety of your apples.
- Check for Doneness: Gently pierce an apple with a fork. It should slide in easily but still have a slight structure. The sugar should be visibly caramelized and bubbling.
Serving Suggestions & Storage Secrets
Once your baked apples emerge from the oven, they are ready to be savored.
- Simply Scrumptious: Enjoy them warm, straight from the oven, allowing their natural flavors to shine. The gooey, caramelized filling and tender apple flesh are a treat in themselves.
- Vanilla Ice Cream Dream: A classic pairing! A scoop of creamy vanilla ice cream melts beautifully over the warm apples, creating a delightful hot-and-cold sensation.
- Salted Caramel Symphony: Drizzle with a good quality salted caramel sauce for an extra layer of decadence.
- Whipped Cream or Custard: A dollop of fresh whipped cream or a pour of warm vanilla custard can also elevate the experience.
- Yogurt Parfait: For a lighter take, serve with a spoonful of Greek yogurt and a sprinkle of granola for breakfast or a healthy snack.
Storing Leftovers: Should you be lucky enough to have any leftover baked apples (a rare occurrence!), store them in an airtight container in the refrigerator for up to four days. To reheat, gently warm them in the oven at 300°F (150°C) until heated through, or microwave for a quick individual serving. Reheating in the oven helps maintain their texture better than a microwave.
This quick and cozy baked apples recipe is more than just a dessert; it’s an invitation to slow down, savor simple pleasures, and fill your home with comforting aromas. With its ease of preparation, wholesome ingredients, and naturally gluten-free nature, it’s a recipe you’ll undoubtedly return to again and again. So, next time you're craving a sweet treat that feels like a warm hug, reach for those apples and get baking!
